Building a prototype without the hassle of a database
This is going to be a hands-on tutorial for getting sample data into a prototype application that you’re composing. We’ll demonstrate using a NextJS web application, but the same approach works for other application types, including desktop apps built using Electron or mobile apps built using Flutter.
Why would you want to do this? Because sometimes you just want to communicate an idea quickly without having to deal with the headache of a database. Colin Matthews says it well in a recent post about Cursor and other tools:
But what’s cooler is that you can use these tools to build functional prototypes from a Figma design, convert a rough hand-drawn sketch to a working app, translate a PRD document into an interactive prototype, or even build a usable internal tool for your team, with no coding ability
Getting Started
Install Cursor and get your laptop setup for composing a Node app.
Follow the instructions for creating a new NextJS app with ShadCN. Specifically:
npx shadcn@latest init -d
And then when prompted, create a new project, sample-cars:
✔ The path /Users/name/dev/specstoryai does not contain a package.json file. Would you like to start a new Next.js project? … yes
✔ What is your project named? … sample-cars
Add two simple components, button and card:
cd sample-cars
npx shadcn@latest add button card
And open your new project in Cursor:
cursor .
(If you haven’t already setup the cursor command on your machine, you can do so now inside Cursor by typing Ctrl/CMD-Shift-P to bring up the Palette and then running Shell Command: Install ‘cursor’ command).
Start the development server:
npm run dev
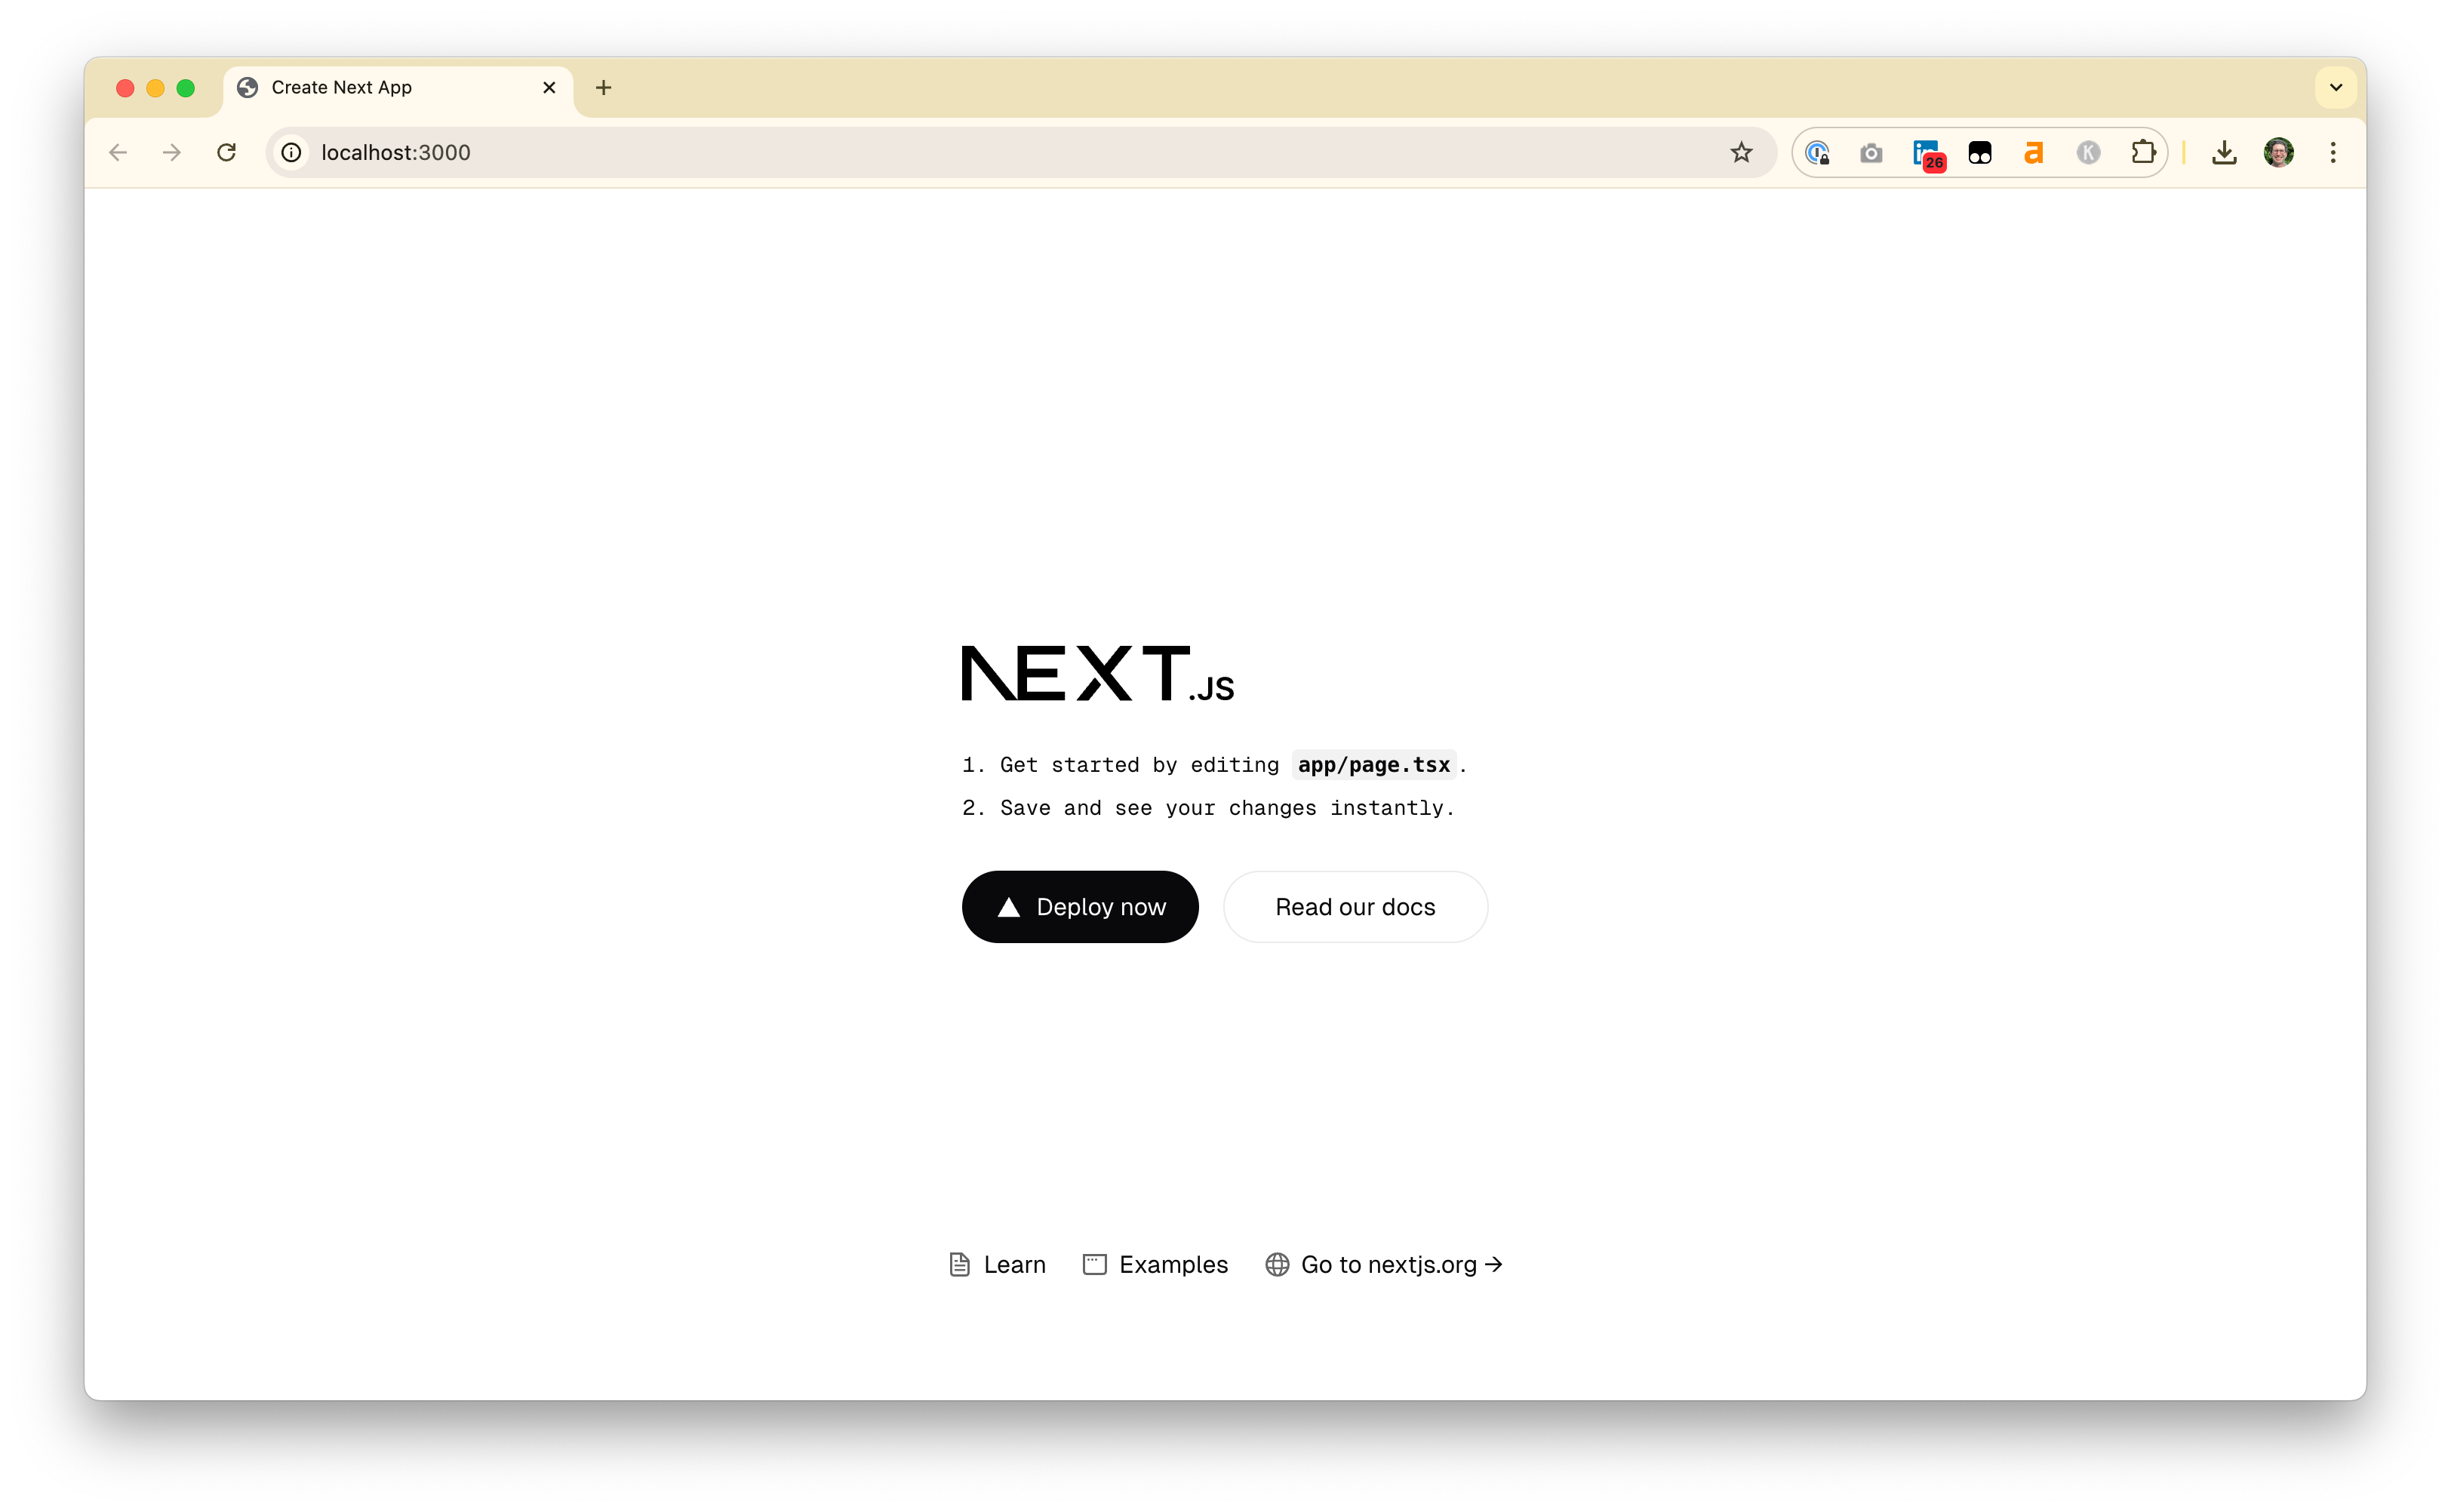
You should see the Next.js sample app if you visit http://localhost:3000.
Creating sample data
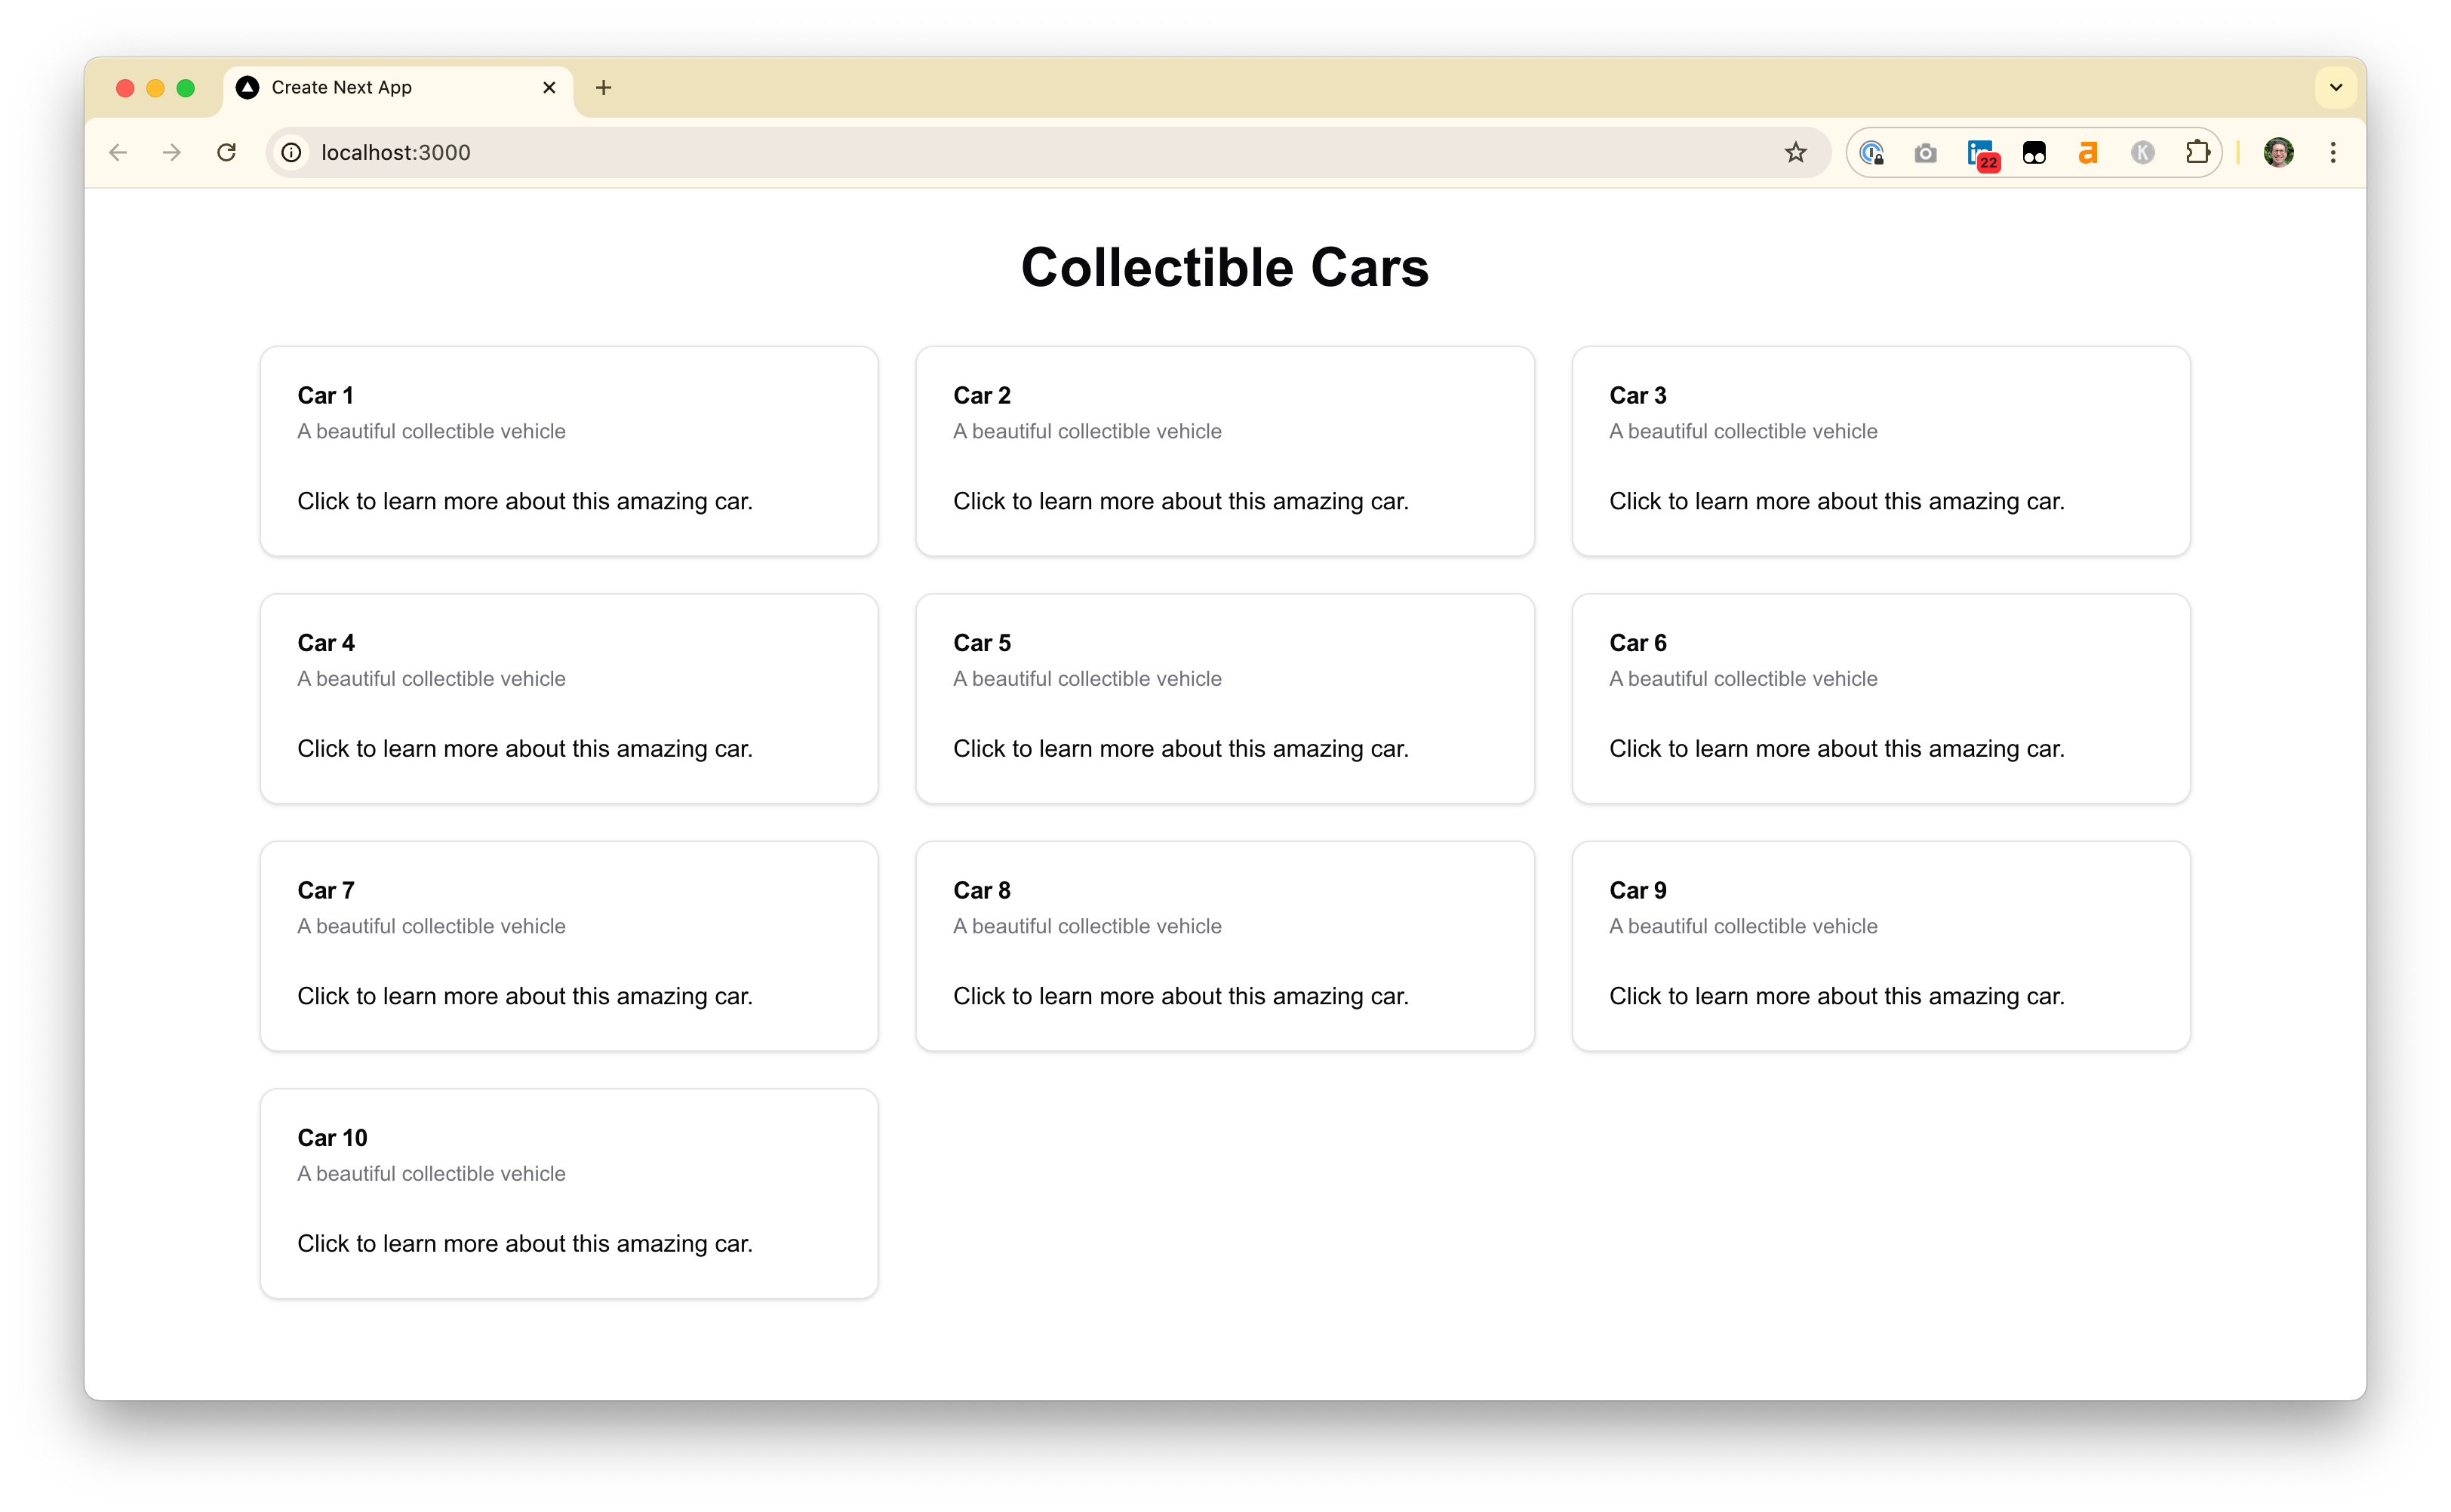
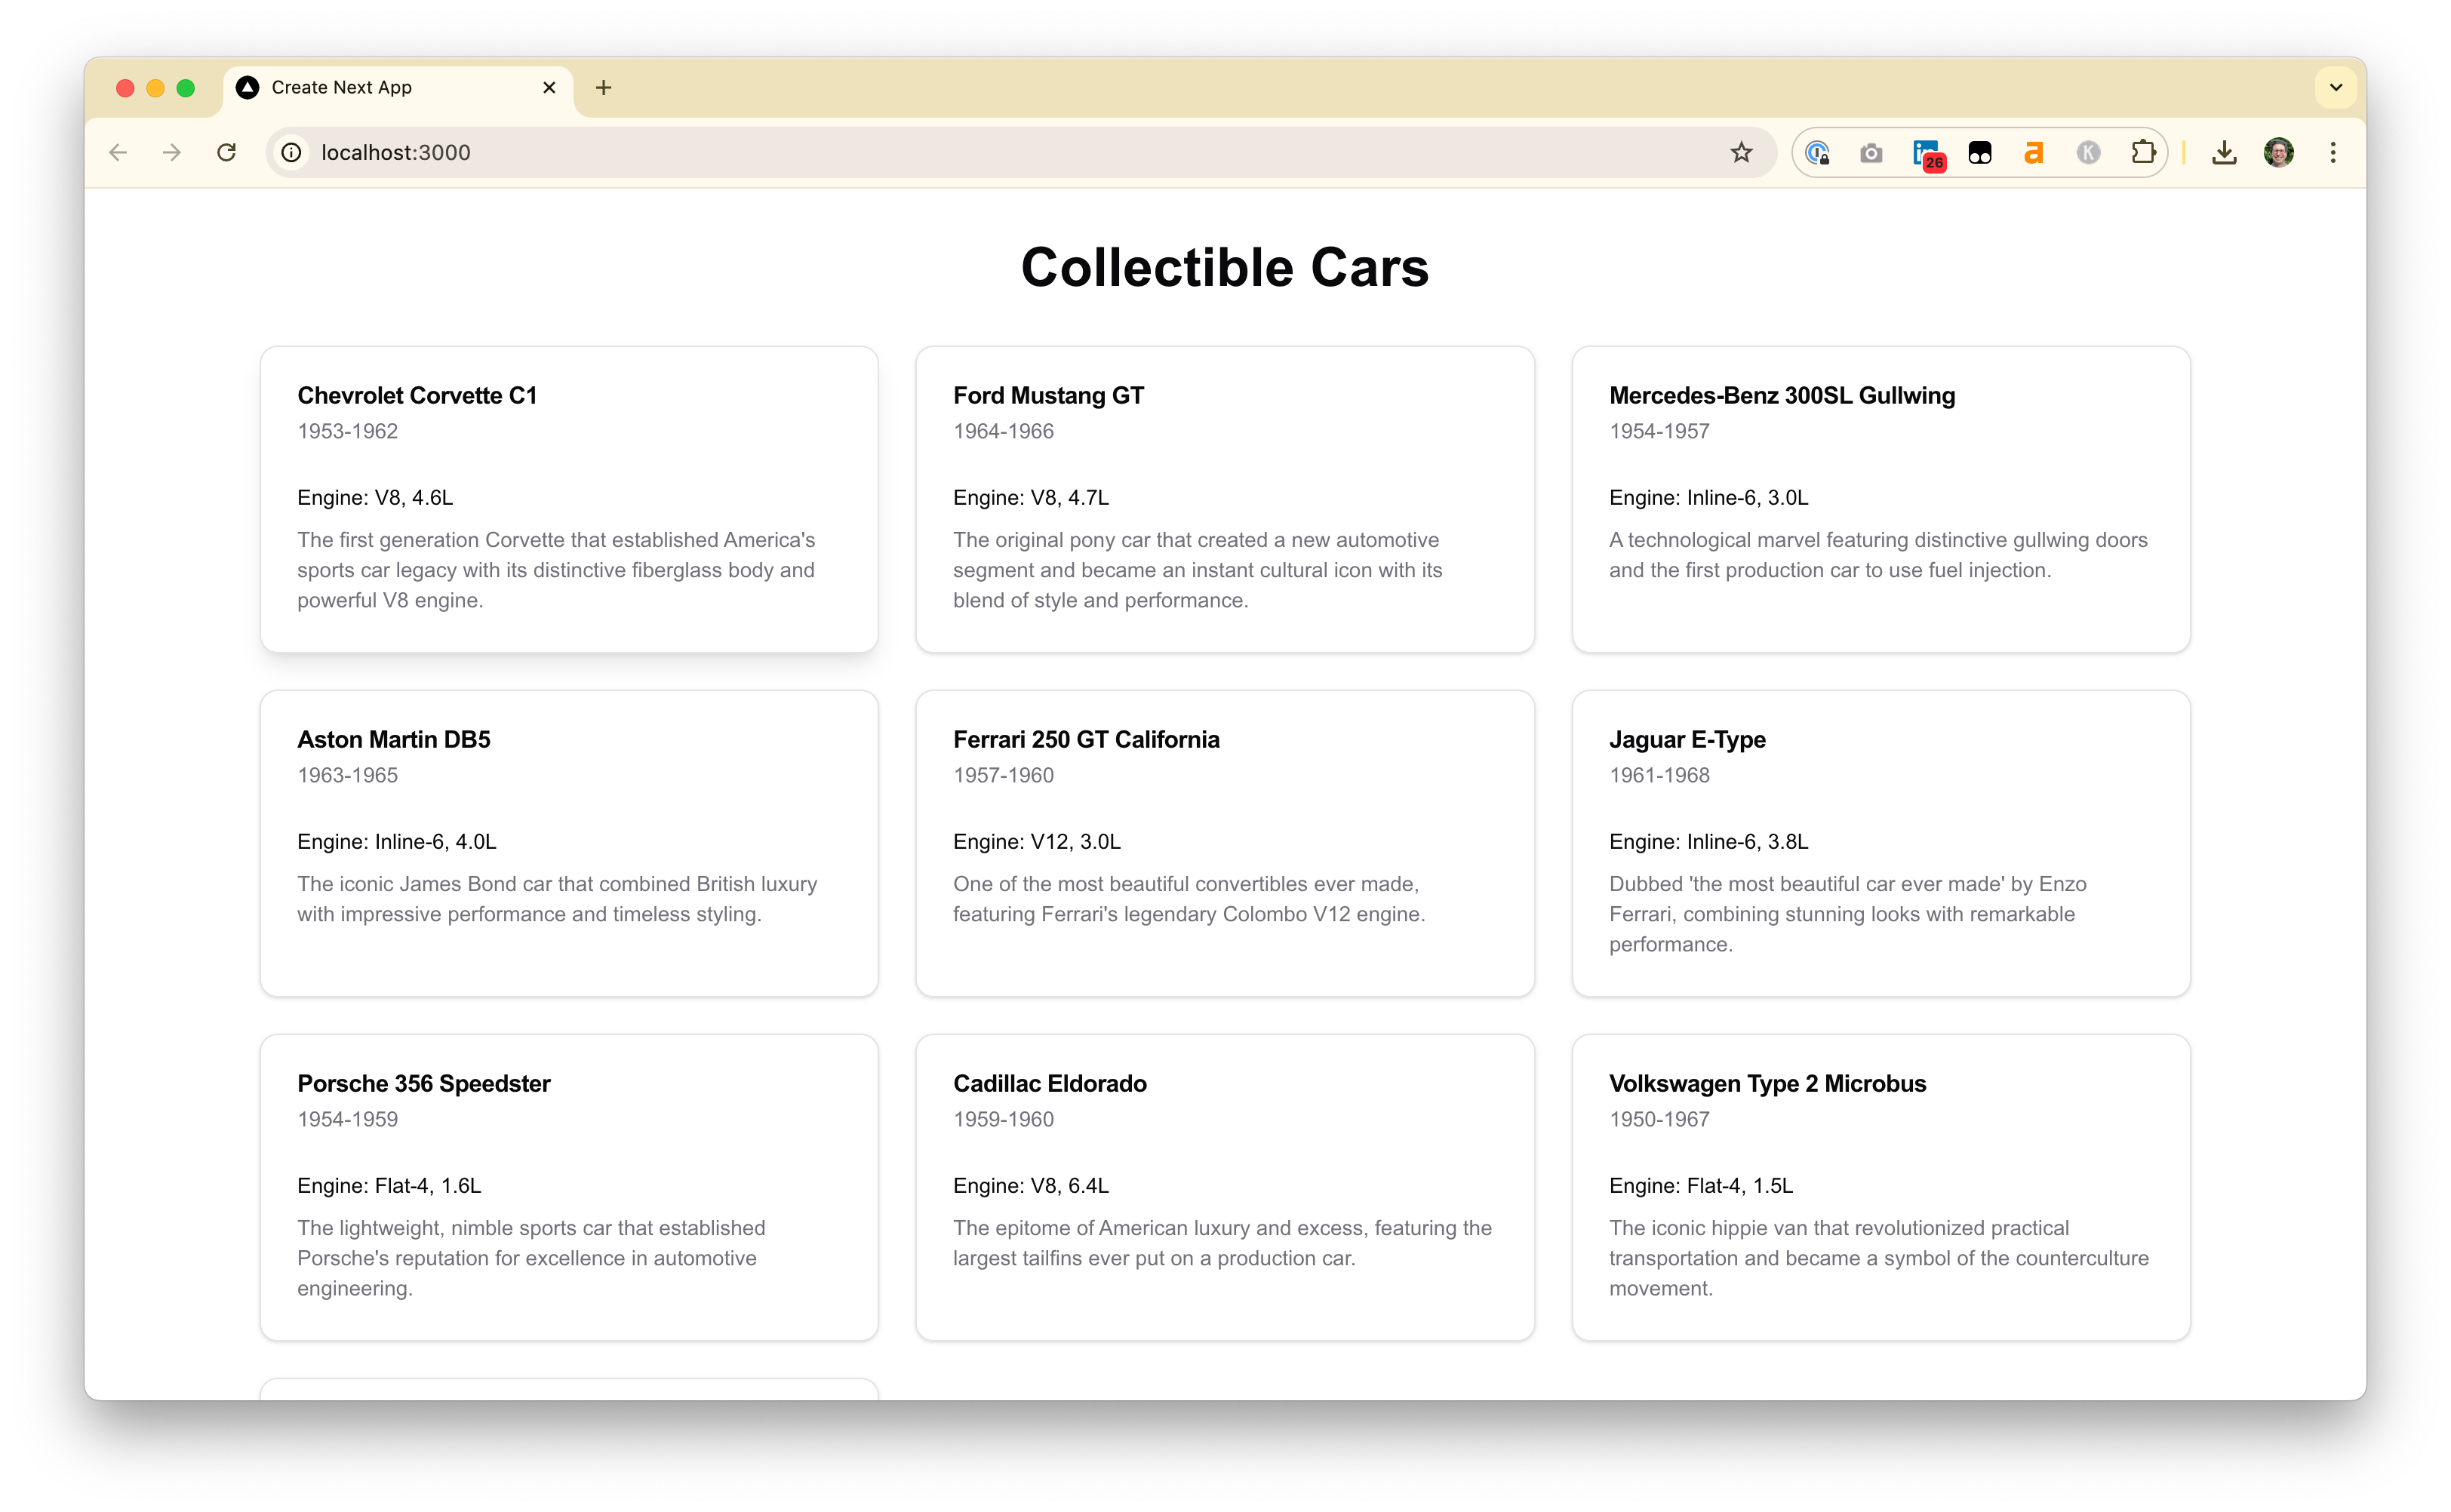
This is a great start, but as you can see the placeholder cards are all identical. This doesn’t really get the concept across. Let’s prompt for some sample data:
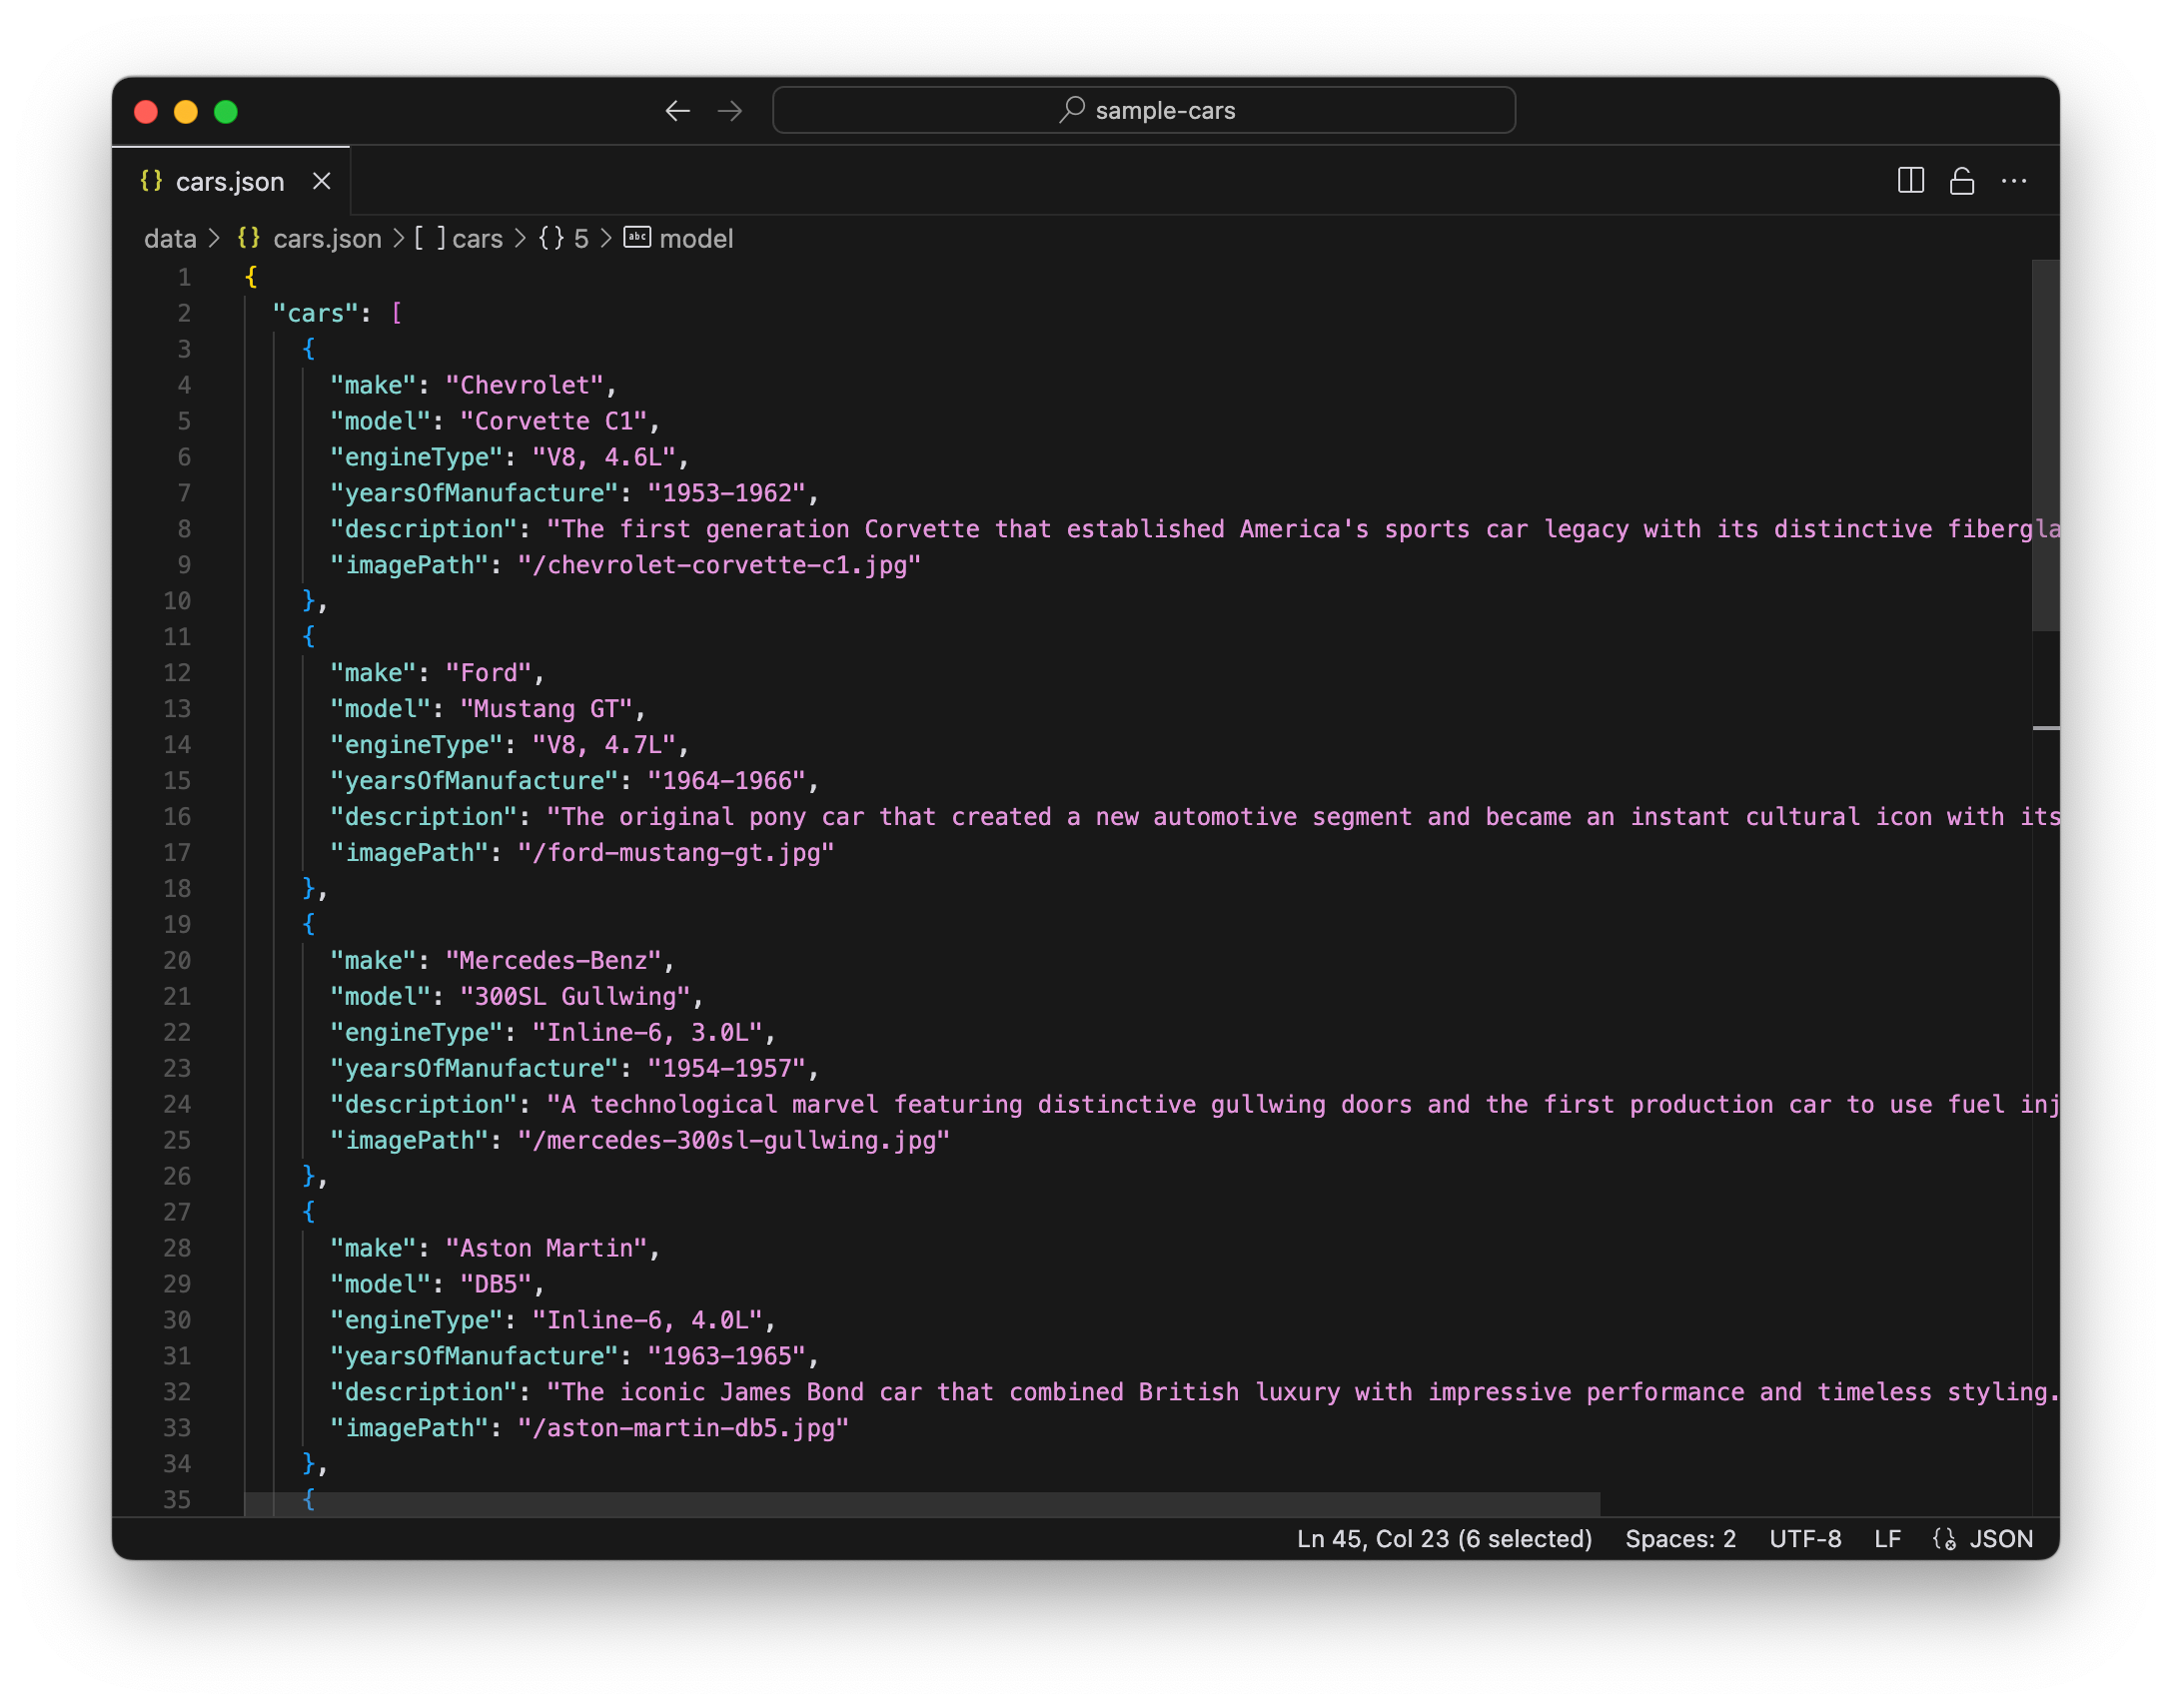
Add a new file that will hold JSON sample data for our application. Create an array of 10 cars using examples of classic cars from the 1950s and 1960s. For each car, store the make, model, engine type, years of manufacture, and a one sentence description.
I’m pretty intentional here about asking for a new file, mainly to keep my project and directories clean, and about asking for JSON data which is a widely used standard format for saving data. I gave Cursor some specifics to guide the creation of sample data, including the properties I wanted (make, model, etc). But you can also often get good, if sometimes surprising, results with open-ended requests, like Create an array of data for 10 classic cars. Finally, asking for an array in this prompt was intentional. We likely would’ve gotten the same results asking for a list of cars or just sample data for 10 cars. But in this case I knew specifically what I wanted for this tutorial. In general, it’s worth experimenting with the level of specificity of your requests. Being overly specific, especially on a topic you don’t yet know well, can steer the AI in the wrong direction and prevent it from making better recommendations.
Displaying the sample data
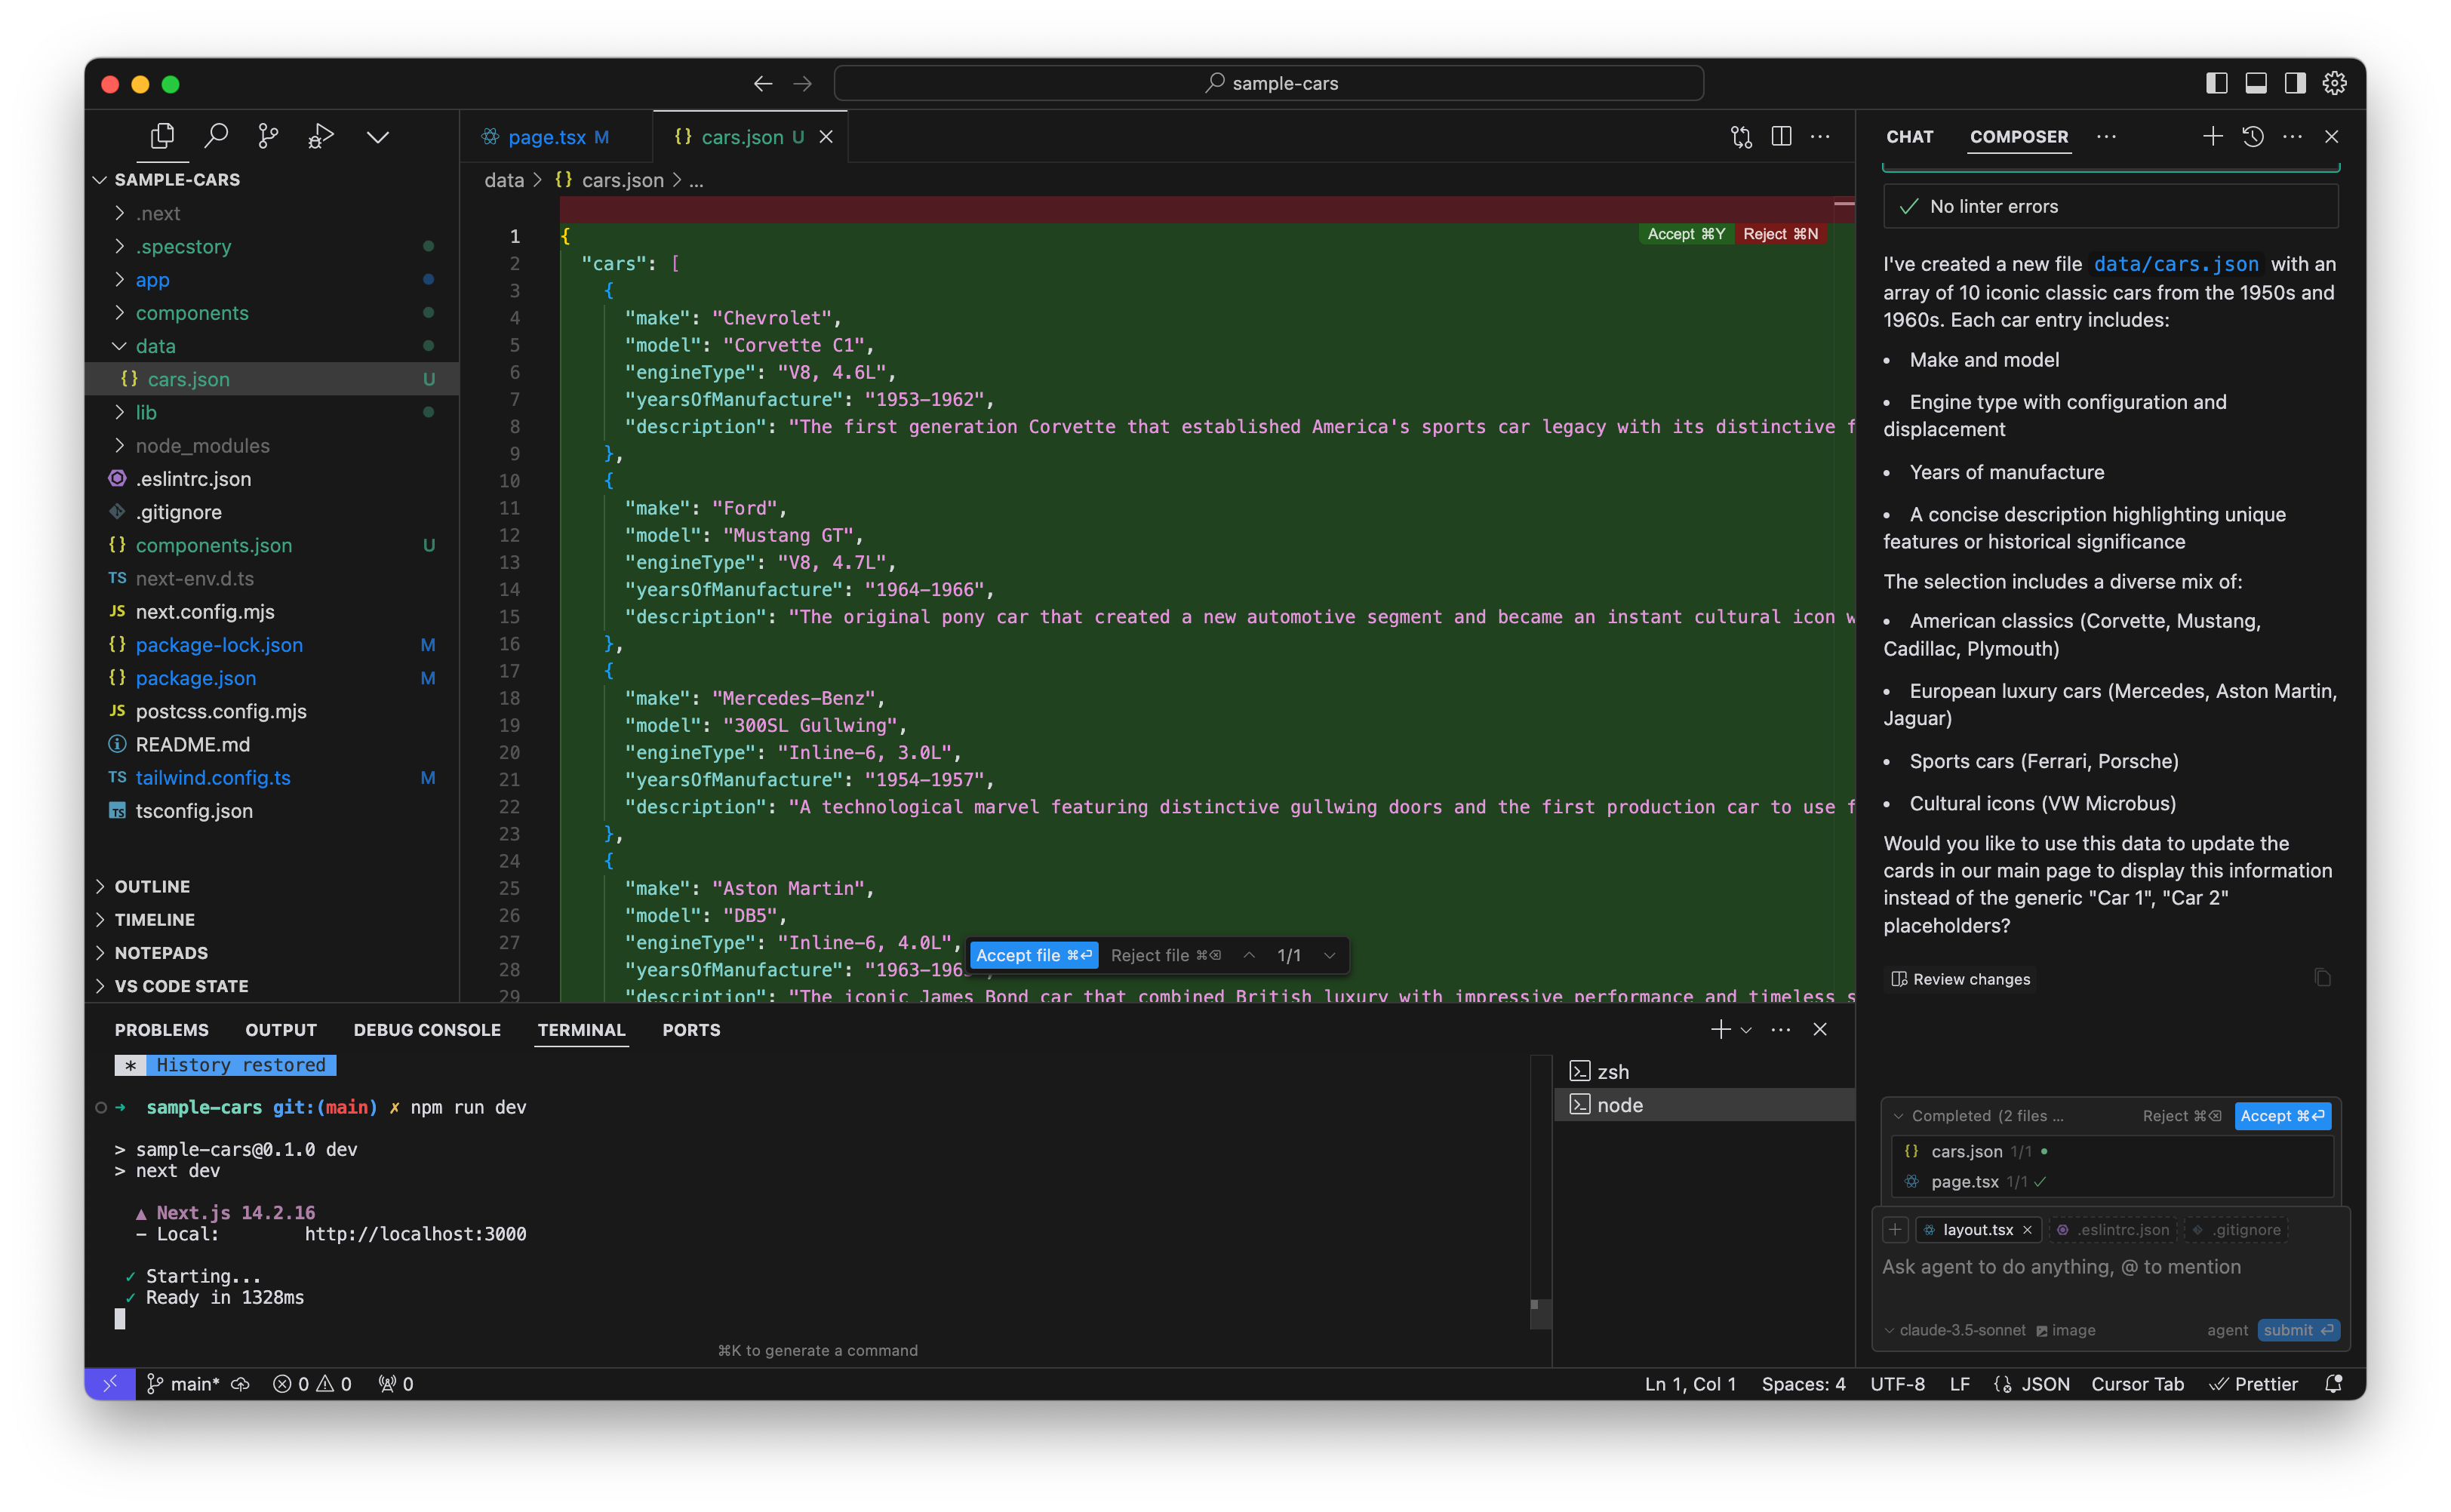
In this case, Cursor did a great job of generating a sample data file for us, but it didn’t make the leap to placing this sample data onto the page for us (in /app/page.tsx), so when we view the page we won’t see any change.
Reading Cursor’s response carefully, we see that it did at least ask if we’d like it to make the update to the main page to use this data. If your Cursor session also deferred making use of the sample data, you can use a prompt similar to this one to get it to finish the task:
Using this data, update the cards on our main page.
You might inevitably hit some hallucinations like we did with the Cadillac Eldorado, which was actually manufactured from 1952-2002. Fact check and manually correct the data file Cursor produced, until you’re satisfied.
Images - the SVG placeholder trick
Now some images would be nice. The fastest approach is to have Cursor generate a placeholder SVG for you and then display that on all the cards.
Generate a new SVG file in /public that is a placeholder image
we can display for all the car cards.
Use it on all the cards on the page.
For our type of application, a NextJS web app, any files in the /public folder will be available through the web server. For example, if you place image.png into the /public folder you’ll be able to access it at a URL like http://localhost:3000/image.png.
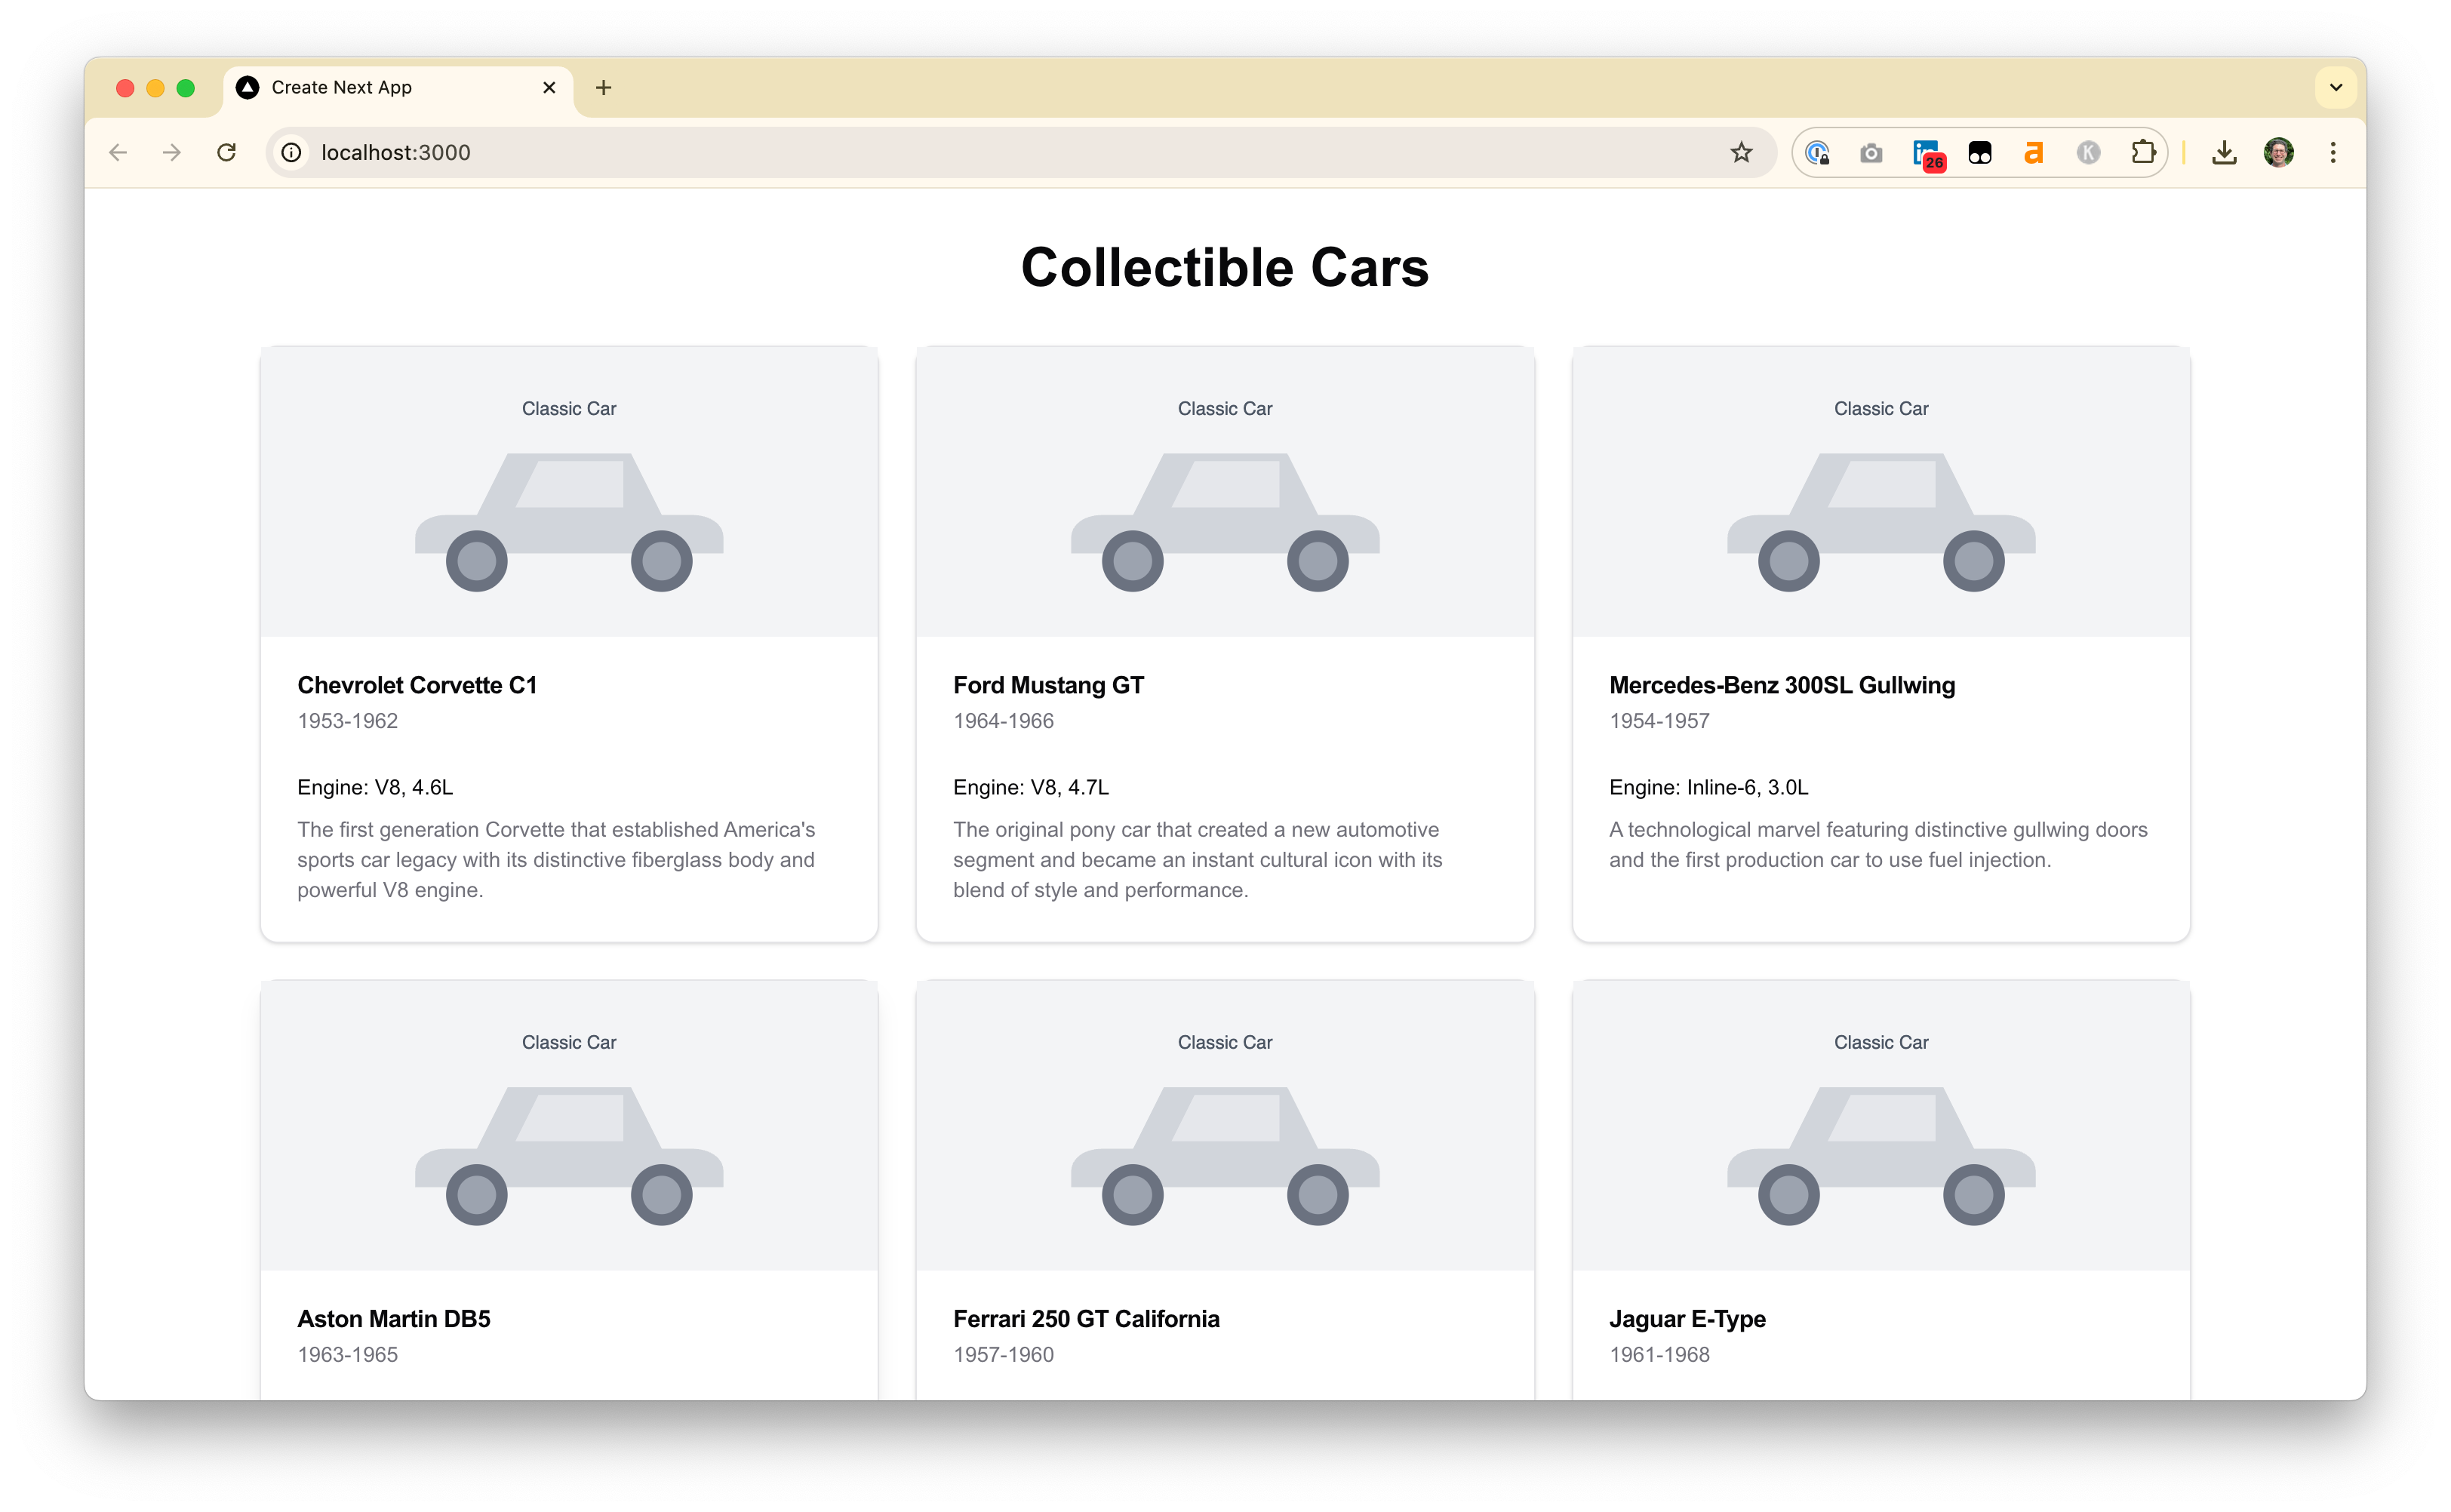
Not very stylish, but at least it gets across some of the spacing and layout for our prototype. To take this to the next level, we can get images for each of these classic cars and copy them into the /public folder.
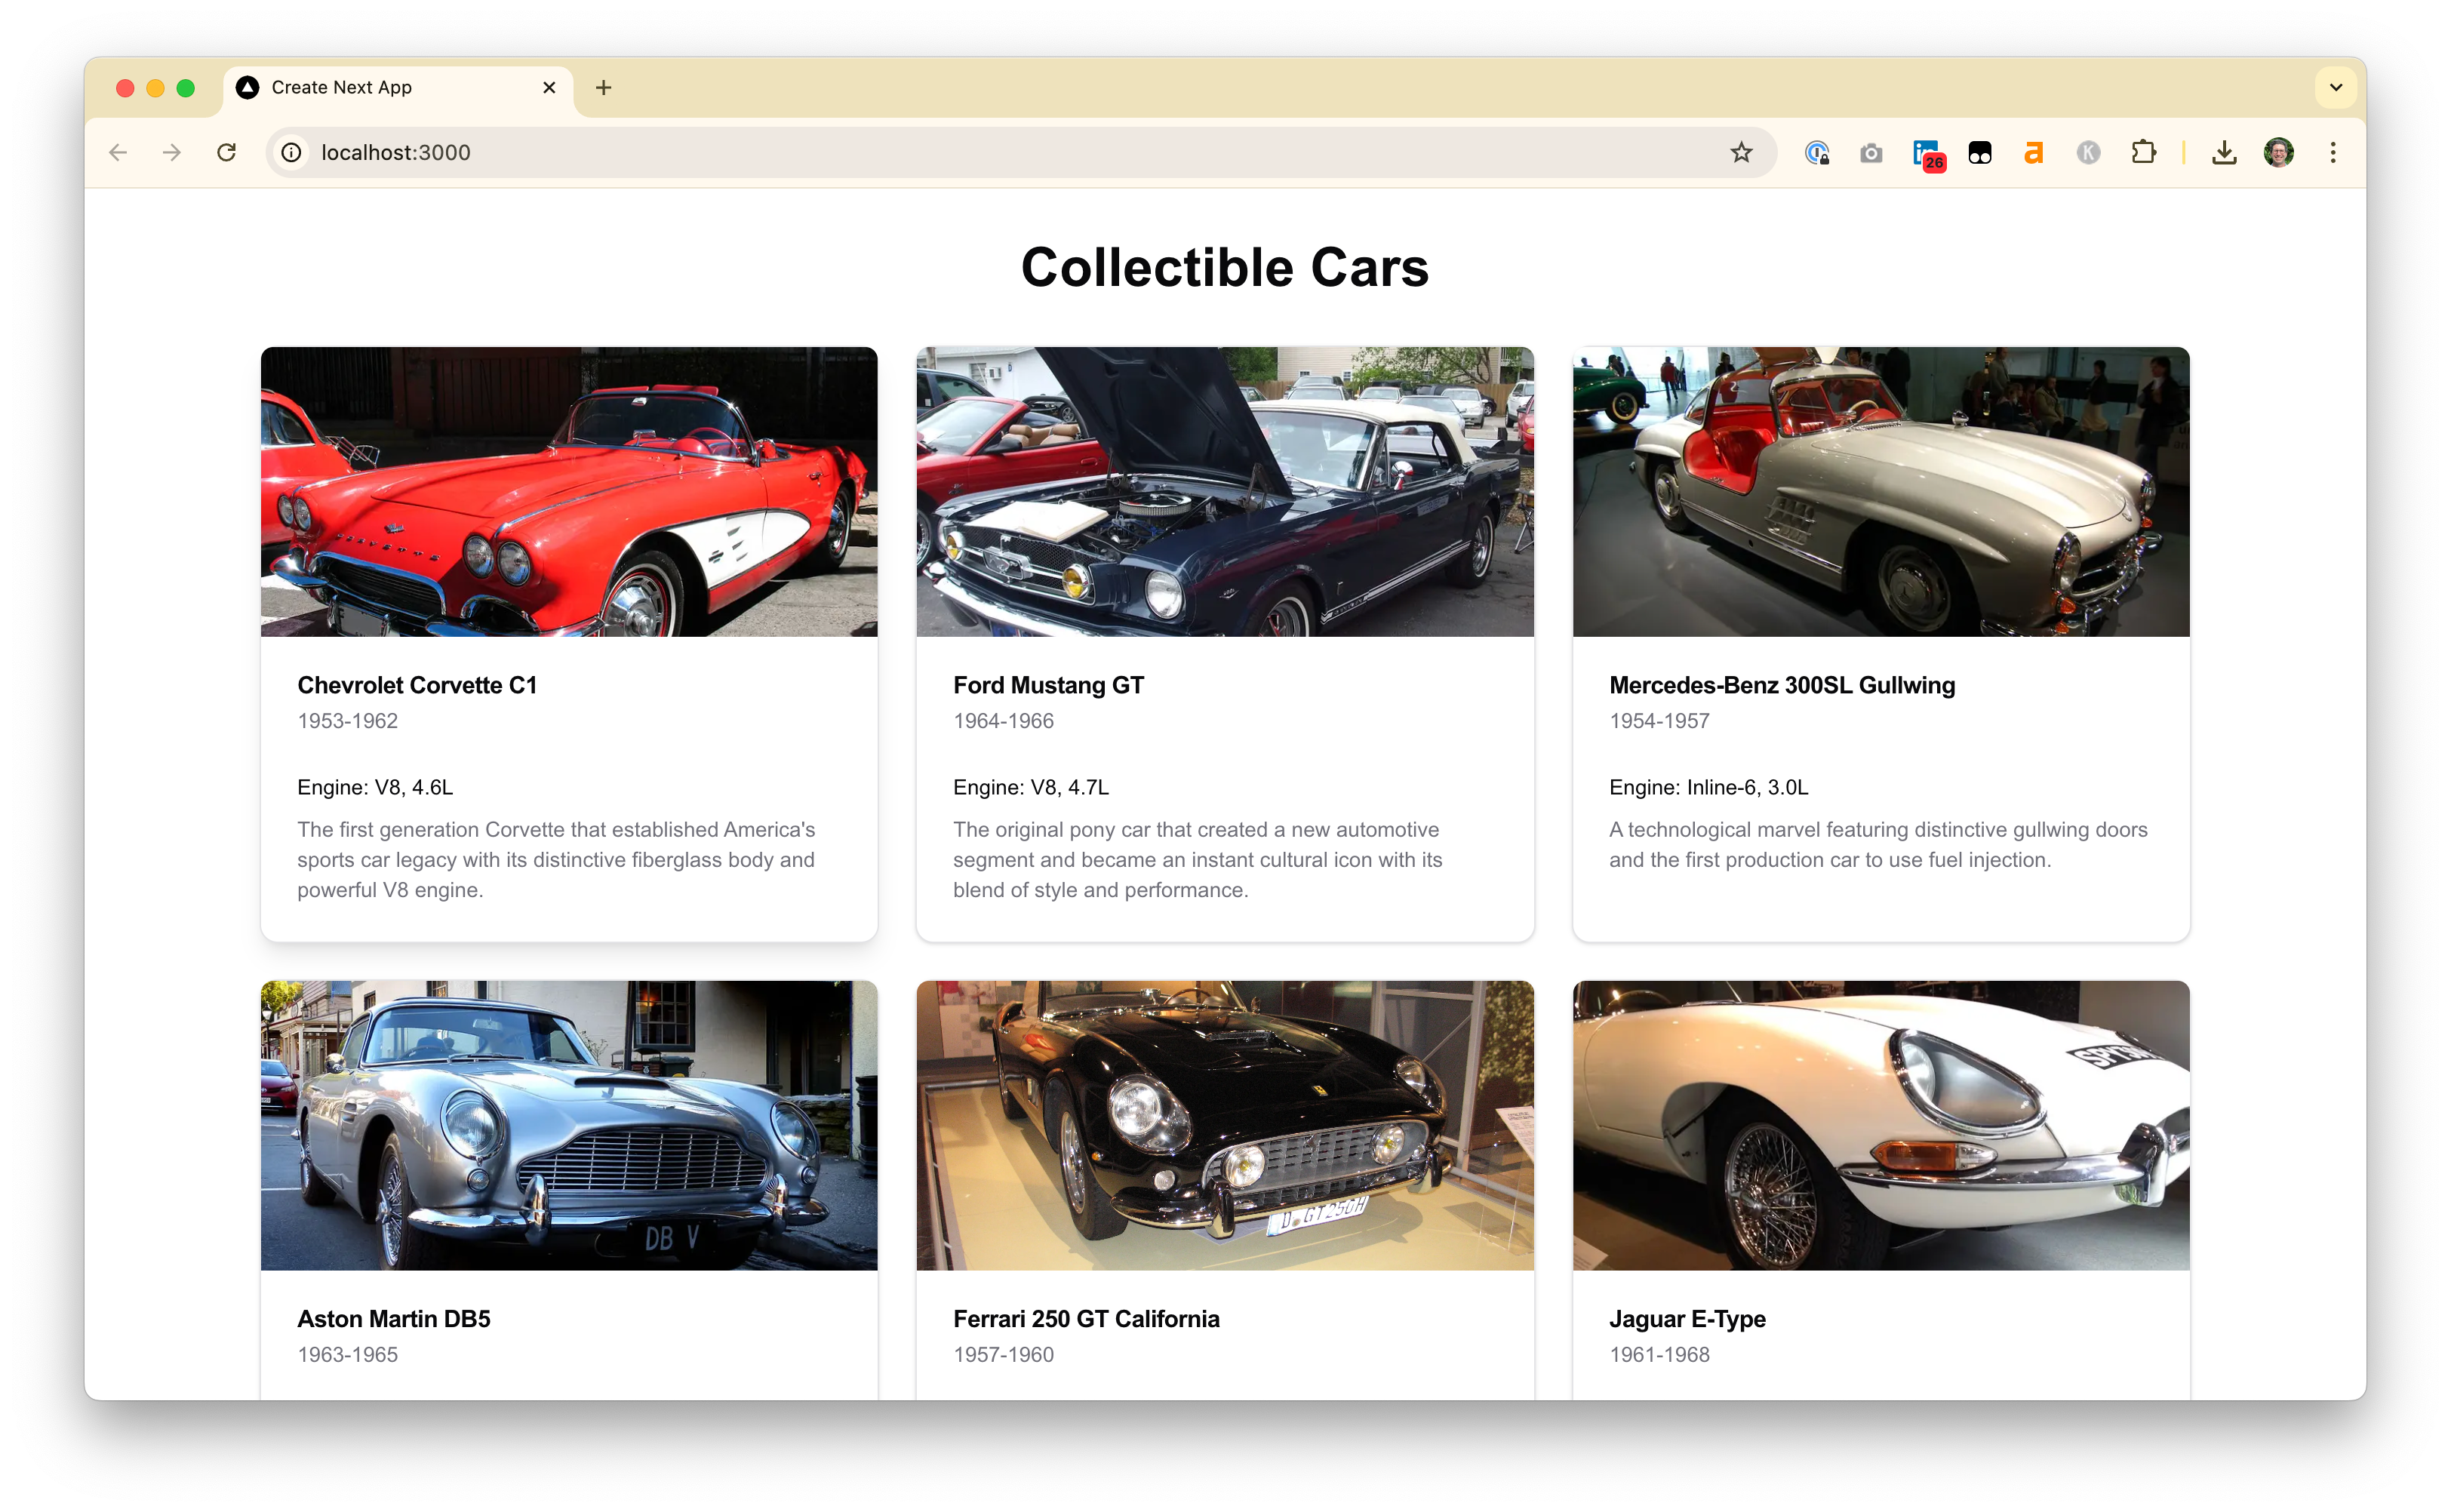
Real images - the naming convention trick
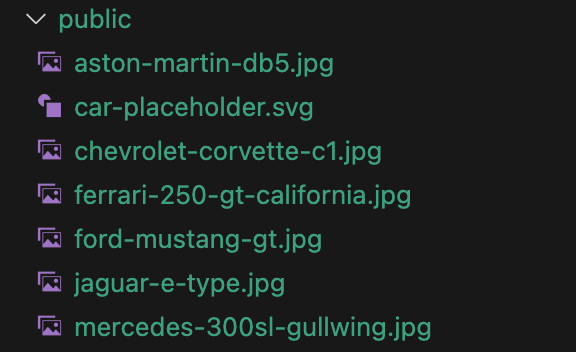
I attempted to use ChatGPT with “Search the Web” enabled to find an image for each one of these 10 classic cars. But the results were mixed, and more often than not it hallucinated dead links. A more accurate approach is to use the Creative Commons Search Portal and paste in the name of each car in your sample data set. Download each image, rename it to something like make-model.jpg or make-model.png (e.g. chevrolet-corvette-c1.jpg) and copy it into the /public directory in the top of your sample-cars project. This will let Cursor connect the JSON data with the right images.
If you’ve named the files to match the make and model in your JSON data, it’s now easy to prompt Cursor to reference them:
The @public directory now has real images for some of the cars.
Update the sample JSON data file to include links to images if available or to the placeholder SVG if not.
Make these new images render on the cards on the page.
Making sample data interactive
Now let’s add the ability for the user to pick their favorite cars.
We want to let the user select their favorite cars and bring them to the top of the page.
Add a ShadCN button to each card with an icon for "favorite".
This might work for you, but I hit the following error when Cursor tried to import the icon for the button.
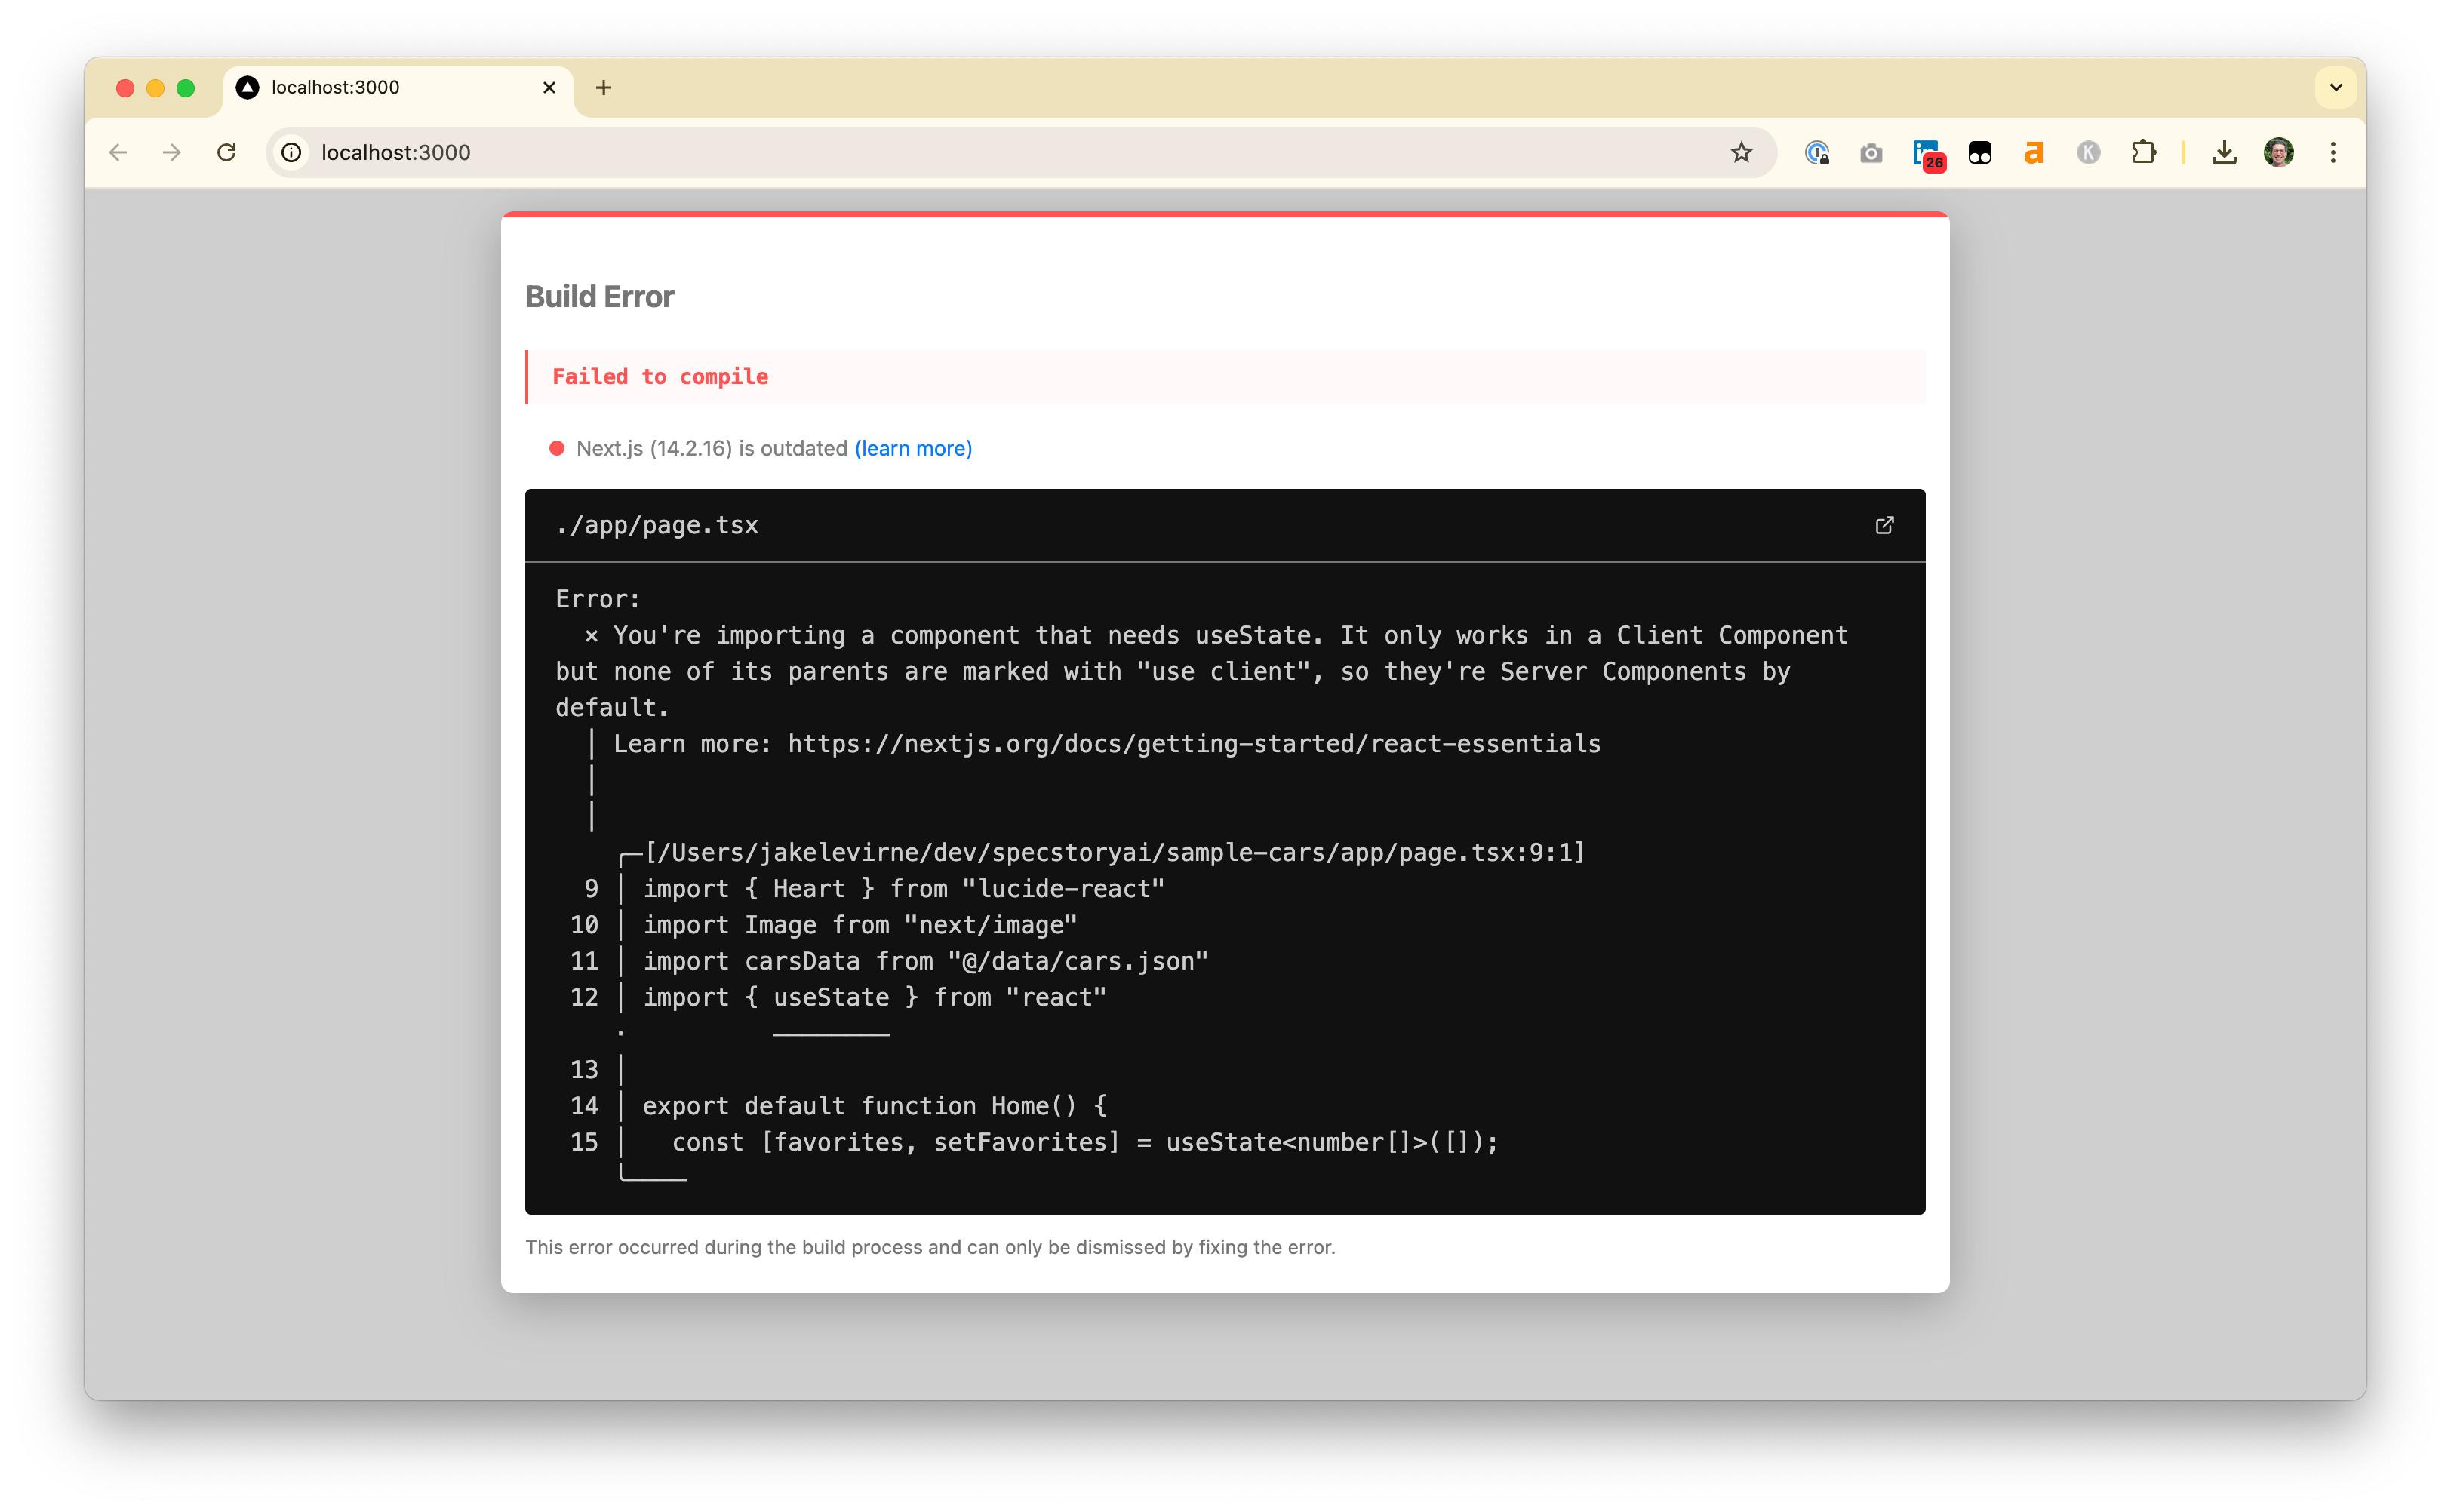
Though the Cursor composer agent can automatically handle linter (coding-time) errors, it can’t handle build-time errors like this one without your help. Copy and paste the entire error into your Cursor prompt and it should be able to resolve it for you.
Build Error
Failed to compile
Next.js (14.2.16) is outdated (learn more)
./app/page.tsx
Error:
    × You're importing a component ...
And now you can click a heart to mark one of the cars as your favorite and move it to the top of the page!
See the full Cursor history for this project and stay tuned for more data topics such as using HTML Web Storage (localStorage), and composing scripts to gather sample data.